

2 Bujin Arasuda
2 Bujin Mikazuchi
3 Bujin Yamato
3 Bujingi Crane
1 Bujingi Crow
2 Bujingi Hare
2 Bujingi Pavo
3 Bujingi Peacock
1 Bujingi Quilin
2 Bujingi Turtle
1 Honest
2 Bujincarnation
1 Dark Hole
2 Fire Formation - Tenki
2 Forbidden Lance
2 Mystical Space Typhoon
1 Bottomless Trap Hole
2 Bujin Armament - The Sword
2 Phoenix Wing Wind Blast
2 Skill Prisoner
1 Solemn Warning
3 Bujintei - Susanowo
2 Bujintei - Kagutsuchi
2 Bujintei - Tsukuyomi
8 Other generic and tech choices
*Note: Excludes PRIO set of cards
Out of all the Deck Concepts Konami has created in this era of Yugioh, none are as bizarre as the Bujins. Bujins are a series of cards that began in the set JOTL (Judgment of the Light) and received continued support in SHSP (Shadow Spectres) and LVAL (Legacy of the Valiant). Their play style revolves around the cooperation between the Beast-Warrior-type Bujin monsters that are on the field, and the Bujingis that are in your hand and Grave. Simply put, the Beast-Warriors beat your opponent, the Beasts are the Graveyard utilities, and the Winged Beasts are your hand utilities. Ever since their debut, Bujins have been very apparent on the radar of many duelists. Unlike most other deck concepts introduced, Bujins are not about swarming the field with monsters. Instead, their preferred method of play is to snowball advantage, very preferably with the use of Bujin Yamato.
"During each of your End Phases: You can add 1 "Bujin" monster from your Deck to your hand. Then, send 1 card from your hand to the Graveyard."
Without a doubt, this card is the heart of the Deck. It allows the your Bujins to set-up very easily. But, what good is talking about the engine if it doesn't have the monsters that work with it?
Protection from the Grave, Bujingi Turtle and Bujingi Hare.
These two monsters should be the predominate focus of the ones that go into the Graveyard. Bujingi Turtle protects your Bujins from being targeted by card effects and, while Bujingi Hare can only be used once per turn and can only be used on Beast-Warriors, it's protection in the form of taking the destruction by battle or by a card effect once per turn is gamechanging, and fits very well into what Bujins are about. Here is some things that one has to know about these two:
Different Monsters mean Different Timings
These two monsters covers each other's weaknesses. However, they both have very different timings. Bujingi Turtle can only be used in the reaction of an effect that targets a monster. This means that if your opponent can remove Turtle from your Graveyard with a card effect, then Turtle cannot guard itself. On the positive side, Turtle can be used during the damage step, unlike Hare. Onto Hare's side, Hare has the benefit of triggering at virtually any time. This has many different advantages going for it, such as not being restricted to a specific window of activation. Your opponent will be guaranteed to have a more difficult time dealing with Hare, as the Bujin player can declare Hare as Chain Link 2 in response to something such asImperial Iron Wall or Light-Imprisoning Mirror, two frequently sided-in cards that can leave a dent within the Bujin's strategy. Now that the protective Grave-based monsters are covered, it is time to move onto the important hand-based Bujins. Run both Turtle and Hare @2.
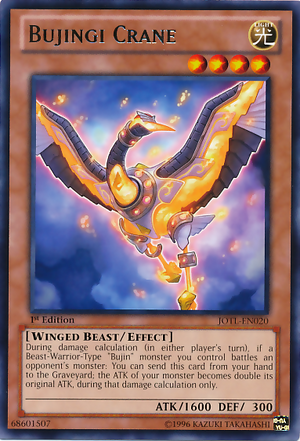 Bujingi Crane, Bujingi Crow and Bujingi Peacock are ridiculously important towards the Deck's Goal. Bujingi Crane is the Deck's main offensive card. It works as the hidden dagger for surprise kills on your opponent's monsters. It allows your Bujin monsters to stand up to otherwise larger monsters that would normally be insurmountable in strength. In addition, Crane also resets the ATK of the monster it is affecting since it takes into calculation the Original ATK of the monster (and not the current ATK). So far, the lowest-known value of a Crane-boosted ATK in normal circumstances is a whopping 3200 ATK with Bujin Arasuda. While Crane is the hand-based Sword of the Bujins, what about the hand-based Shield of them? While it isn't as important as Crane is, Crow still has a very good niche within the Deck, especially when up against monsters whose effects trigger upon being destroyed by battle. Anyways, Crow is a Bujin Beast-Warrior-type specific Magic Cylinder from the hand that deals back half of the ATK rather than the full ATK. The advantage Crow has over Cylinder in this regard is the element of surprise. It is almost guarantee-able that, unless if your opponent knows ahead of time, then they will not see the Crow coming at all, and it just may cost them the round for being caught off-guard like that. The final monster in this section is Peacock. Peacock is like that eerily different sibling that a person has in their family: they operate very different from the norm conditions, yet it still benefits the family for the good. Peacock only works during the Main Phase 2, and only if you did not activate any non-Bujin Effects during the turn. However, the effect of Peacock becomes more than worth it since it can search any Bujin monster from your Deck and bring it into your hand. It's a mini-Yamato in that regard, and it will help keep the pressure going from mid-late game. Run Crane and Peacock @3 and Crow @1.
Bujingi Peacock vs. Fire Formation - Tenki
Both of these cards fulfill very similar niches: Search out your Bujins. Yet, one can confict with the other in regards of usage. So, which of these two are better? Let's count the pros and cons of each:
Pros of Bujingi Peacock
-Has a larger list of monsters to choose from within the respective Deck
-Easily searchable
-No worries about counters, since there aren't many cards that can stop monster effects that activate in the hand.
-1800 Beater in a pinch
Cons of Bujingi Peacock
-Conditions hamper the speed of the timing
-Easily conflicts with non-Bujin cards
Pros of Fire Formation - Tenki
-Quicker to use
-Offers a boost of 100 ATK to your Bujin Beast-Warriors
-Can be searchable with a tech'd Bear
Cons of Fire Formation - Tenki
-Dies to any form of chainable removal. If it doesn't resolve, then the moment is greatly hindered.
-Can end up clogging your Field
While both have their pros and cons, any sane duelist should try to max out on copies whenever possible. Both of them are very useable searchers and offer various strategies to use in a player's combos. It's a draw between the two.
The Other Beast-Warrior Bujins
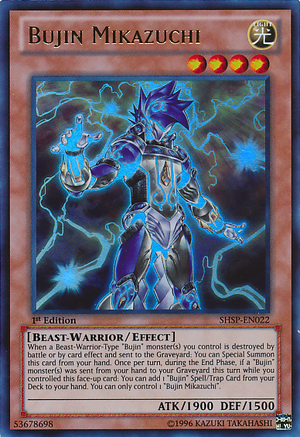
Bujin Mikazuchi and Bujin Arasuda, while they aren't as important as Yamato, are still very important to the Deck for the sake of being natural Beast-Warriors. Bujin Mikazuchi is a wonderful monster for Bujins in the fact that it is another safety net for Bujins to fall on when the player is unable to protect their Bujin monster successfully. 1900 ATK isn't something to snuff at either. Another huge strength to this card is that if the player has a Bujin monster sent from their hand while he's out, then he can add a Bujin Spell/Trap Card from your Deck to your hand. I'll go on about this later, but now we go towards Bujin Arasuda. Now, Arasuda has the weakest ATK and most conditional trigger out of the three Beast-Warriors. In order to trigger his end-phase effect, the player has to have searched out a Bujin card during the turn while he's on the field. What the player gets from doing this is a simple draw and send effect. While this might seem underwhelming at first, it does have its uses, and smarter players would know how to combo with this card effectively. Like Mikazuchi, Arasuda also has a Special Summon condition in the form of being summonable from the hand if a Bujin monster is banished from your field or Graveyard. Because of this card and the interactions with cards such as Hare and Turtle, Arasuda adds a very good amount of necessary speed to the Deck. While Mikazuchi and Arasuda aren't Yamatos, they still are essential to the Deck's win condition for what they offer. Run these two @2.
Strike back from the Grave
While Protection of the Grave covers what Grave-based Bujins are capable of doing, these three Bujins have more offensive properties in their arsenal. Bujin Quilin(middle) is the most important of these monsters listed in the pictures above. During the player's turn, while they control a Bujin Beast-Warrior, the player can banish Quilin to destroy a face-up card their opponent controls. This card removes a large amount of threats that can stand against a Bujin Deck, most notably Colossal Warrior and Macro Cosmos/Dimensional Fissure (Provided that Quilin has already hit the grave before the latter cards are activated). The best part is that since it is from the Graveyard, it is an inherent +1 destruction card. Unfortunately, the effect of Bujin Quilin can only be used once per turn. However, that doesn't make it useless in any definition of the word. Bujin Centipede (left) is another important member of the Bujin Deck. Like Quilin, his effect works during the player's turn and only if the player controls a Beast-Warrior Bujin. It also can only be used once per turn like Quilin. However, Centipede functions as the Deck's Spell and Trap removal, which functions as another MST for the Deck. Last, but not least, Bujingi Boar(right) is a card that is used for bringing your opponent's monsters into their weakest state by putting it in Defense Position with 0 Defense. While this isn't as important as actually removing the monster, Boar has a few advantages that he has over the other two monsters in this section: his effect can trigger if the player controls anyBujin monster. That's right, not just Beast-Warrior Bujins can enjoy the benefits of this card, but so can other Bujingis. In addition, he can be used as many times as the player can possibly muster this card into the Graveyard. This makes this card incredibly useful in a pinch if the player needs to remove an immediate threat in the form of a monster. Quilin should be ran @1-2, Centipede can be ran @0-1, and Boar can be ran @0-2.
Other Bujins While this guide won't cover all the Bujingis, either because they don't work well with the Deck or they are underwhelming, there are some other Bujingis of note:
Bujingi Ibis is another hand bird that grants Bujins the ability to inflict piercing damage. It seems underwhelming, and it normally wouldn't be considered in a Bujin Deck. However, when this card is combined with Boar and Bujintei Susanowo(More on him later), then this bird actually spells the opponent's doom and the player's victory. It's a good card for that final sharp slap to the opponent. It isn't required, but it is fun to play with.
Bujingi Fox is another guardian from the Grave. Unfortunately, he absolutely sucks in Bujins. While he's a Waboku (without preventing destruction from battle), he requires an additional cost for him to be of service: In addition to the banish, the player has to also send a card from their hand to the Graveyard, making this card the Deck's official -1 from the Grave. It's definitely NOT a card that a Bujin player should be using. However, it can see use in other Decks that absolutely must have more protection... if it was made any faster.
These two monsters are very... different from other Bujins. They don't work from the hand or Grave like most Bujingi, but their effects work while they are on the field. As long as a player controls Bujingi Wolf, other Beasts, Beast-Warriors, and Winged Beasts cannot be destroyed by battle. While this may seem useful at first, it is far from it. Bujins have a limited Summon capacity that this card just eats up, and this card doesn't provide any useful benefits, quick-term or long-term, since it would have already been destroyed by your opponent. Bujingi Warg, the other half of this duo of difference has to be in Defense Position to get his effect, and all it says is that the controller's Bujins cannot be destroyed by card effects. Does this sound familiar? Well, it should since Bujingi Hare can also do this, but it also doesn't eat up your Normal Summon. That already makes Warg useless. The fact that it has to be in Defense Position to get that effect? Worst. Bujin. Ever. If a player ever considers running these two in a serious Bujin Deck, then please slap yourself.
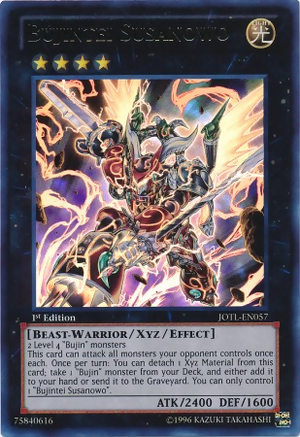 By far, these are essential monsters that have to be included in all Bujin Extra Deck above 1. Bujintei Susanowo has the most useful effect in terms of short-term situations. By detaching an Xyz Material from him, he either adds a Bujin monster from the player's Deck to the hand or can send it to the Graveyard. He also has a ridiculously potent effect of being able to attack ALL the opponent's monsters. With how much support he has, he is without a doubt the best multi-attacker in the game. Has to be made using any 2 Level 4 Bujins monsters. Bujintei Kagutsuchi is another good monster in the Extra Deck. His use is a bit more general since he must be made with any 2 Level 4 Beast-Warrior monsters. It's a bit risky to use many Beast-Warriors in the Deck to summon him, but Kagutsuchi's effects are rather powerful. To start, he mills 5 cards from the player's Deck when Xyz Summoned. Then, for each Bujin card milled this way, he gains 100 ATK. Like him yet already? Well, he becomes more likeable with his detach effect of protecting Bujin Beast-Warriors from destruction (including himself). At worst, he can stay on the field for two hits before vanishing. At the best, he can wins games by himself. Don't expect to Summon him early-game unless if he is ran in a Deck dedicated to bring out 2 Level 4 Beast-Warriors. Finally, Bujintei Tsukuyomi is the Deck's form of draw power. He can be made with any 2 Level 4 LIGHT monsters, which is without a doubt the most generic Bujin monster released at this point. How does he draw? The detach effect has the player discard their hand to draw 2 cards. Drawing 2 cards can be very useful, especially when a player pitches a hand filled with Bujins that are meant to go to the Grave. Though, to be honest, try to keep only 1 card in the hand when using this effect for maximum effectiveness.
Bujin Spells and Traps
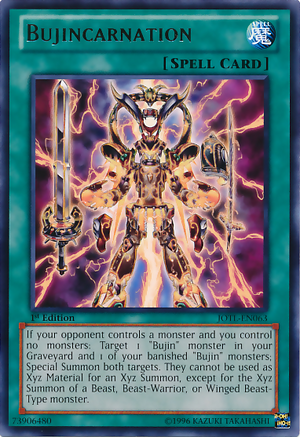
There are a multitude of Bujin Spells and Traps released, and while most of them are situational or not worth the effort, these three range from being slightly useful to being mandatory in Bujin Decks. Bujinfidel is a trap card that has you Tribute a Beast-Warrior Bujin monster you control to Special Summon a Bujin monster with a different name. When this card first debuted, it was honestly terrible since no sane duelist would have tributed their Yamato under any circumstance just to Summon another monster. However, with Mikazuchi and Arasuda available, this card is now playable since Yamato can always be grabbed from the Graveyard. It's still a -1 despite the advantages of chaining at any time to dodge some targeting effects. Run it @1 at most or don't run it at all. Bujin Regalia - The Sword is on a higher rung on the usefulness ladder of Bujins. With this card, the player can add their Bujin monsters from their hand to their Graveyard OR return a Bujin monster that is banished into the Graveyard. That means that a player can recycle birds like Crane and Peacock, or return to the Grave monsters like Turtle or Hare. Also, because it is chainable, it has alot of value when your opponent tries to make their move. Run it @2. No more, no less. Finally, the most useful Bujin Spell/Trap Card is Bujincarnation. Bujincarnation Special Summons 2 Bujin monsters, 1 from the Graveyard and 1 that is Banished. The only conditions are that the player must not control any monsters while their opponent must control a monster, and those monsters can only be used for the Xyz Summon of a Beast/Winged Beast/Beast-Warrior monster, which isn't even much of a cost at all. This card is either recycling power, a big middle finger to the opponent for banishing a player's Bujin monster. Of course, since the common Xyz play to use in conjunction with is the game-changing Bujintei Susanowo, this card itself is a huge game-changer. Run @2, and maybe @3 if you don't mind clogging. All three of these cards are also searchable by Mikazuchi, so adding a game-changing card is so easy in this Deck.
Other Techs and non-Bujin Choices to use
Kaiser Colosseum
Kaiser Colosseum is a rather interesting card. It states that while the player controls a monster(s), their opponent cannot have any more monsters than the player controls. Since the player would only be controlling 1 Beast-Warrior at a time, the opponent will have struggles with trying to play monsters. It's dependent on the Deck, but it can be used anywhere from 0-2 in a Deck/Side-Deck.
Forbidden Lance
If a player isn't running Forbidden Lance in their Bujin Deck, it means that they want to lose. Bujins laugh at the 800 ATK loss because of Crane, and this only puts more pressure on their opponent. Run it @2.
Skill Prisoner
Now here is an underrated card if I ever saw one. Skill Prisoner is a new tech card for Bujins since LVAL. So, why am I mentioning this card? Well, Skill Prisoner has the uncanny ability of targeting a card the player controls and, during that turn, monster effects that target that card are negated. Now, in this day and format, there are buttloads of monsters that have a fondness for targeting cards their opponent controls, and they will go after a player's Bujins. Luckily, this card saves the day! The best part is that, if it is in the Graveyard, then the player can use this effect again by banishing it from the Graveyard during either player's turn, making it much more useful than Skill Breakthrough in a pinch. Now the player can focus their turtles on their opponent's Spell and Trap Cards. If running, run @2. It also happens to be a good candidate for siding-out as well.
Side-Decking
It's an understatement to say that Bujins are very easy to side against. Some of the more common threats are Soul Drain, Macro Cosmos/Dimensional FIssure, Mind Drain, Imperial Iron Wall, DNA Surgery, Light-Imprisoning Mirror, and so on. That's why a Bujin's Side-Deck should be focused on countering cards their opponent sides into.
DNA Surgey
Ironically, DNA Surgery is just as much as an advantage to Bujins as it is a disadvantage. By flipping this and declaring Beast-Warrior, all Bujin monsters you Summon gain the benefits of Beast-Warrior Bujin support. It also overrides their opponent's Skill Drain as well.
Dust Tornado
Notice how most of their counters are continuous? That's why Dust Tornadoes are essential in the Side Deck. They function as additional MSTs. That's enough said.
Horn of the Phantom Beast*
Normally, your opponent will just throw their hand onto the field with monsters that can exceed past the amount of times a Bujin Beast-Warrior can be protected. In those times, Horn of the Phantom Beast is a Bujin's best friend. WIth this card, a Bujin's ATK is increased by a comfortable 800 ATK and has the bonus of drawing for each monster that is destroyed by the equipped monster and sent to the Graveyard. It's surprise protection that will catch the opponent off-guard if used correctly.
D.D. Crow
With being able to banish a monster in the opponent's Graveyard during either turn by discarding this card, D.D. Crow is a popular side-in option that doesn't interfere with the Bujin's Deck Goal.
Vanity's Emptiness
While it is strange that Vanity's Emptiness is a side card, it can't really be used against Decks that are naturally beaters. Plus, Arasuda conflicts with it. Still, it's a very good side that Bujins can use and get around.
What to look forward to
Bujin - Hirume and Bujinki - Amaterasu
With PRIO going to be released, Bujins get 2 more Beast-Warriors. By far, Bujin - Hirume is the biggest non-Xyz Bujin with a whopping 2000 ATK. It cannot be Normal Summoned, but she can be Special Summoned by banishing any Bujin monster from the Graveyard. The Xyz Monster, Bujinki - Amaterasu is also a force to be reckoned with. While she does need 3 Level 4 monsters of any kind, Amaterasu functions as a Leviair during the player's turn, and a Bujin Sword that skips the Graveyard during their opponent's turn. Needless to say, these two cards will definitely help Bujins out by alot.
Final Thoughts
Bujins will always be the underdog archtype due to their playstyle. They don't focus on speed, but they focus on snowballing their opponent card. In this format, they will have an amazing shot at being a prevalent force to be reckoned with. With the best control factor out of any archtype, a Bujin player's opponent will not have an easy time playing around them by any means. To me, this Deck is proof that Konami knows how to make a good Deck without revolving it solely around speed or a mix of speed and control. They are just control, and they are loveable like that.
by ZeroChill
its only 39 cards
ReplyDelete